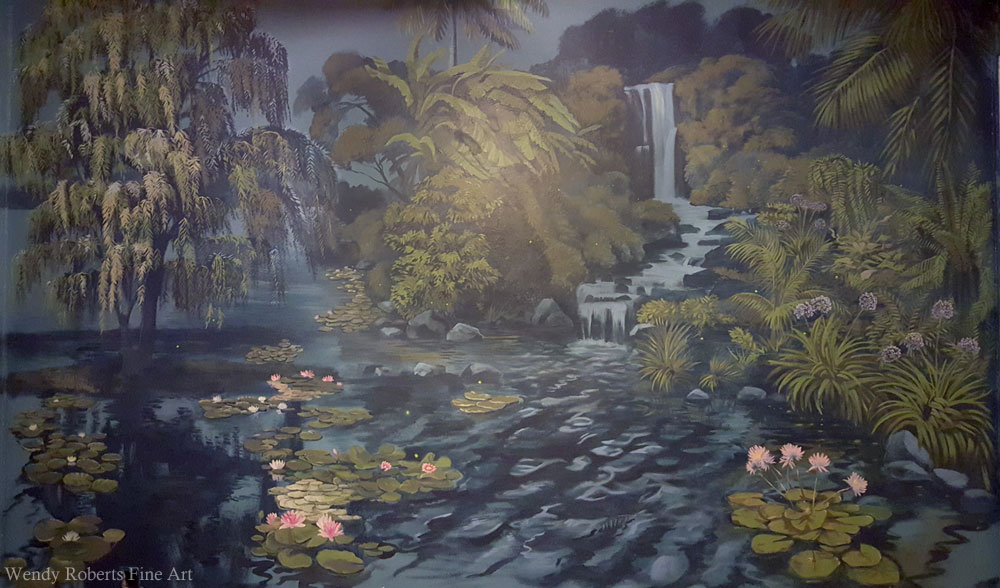
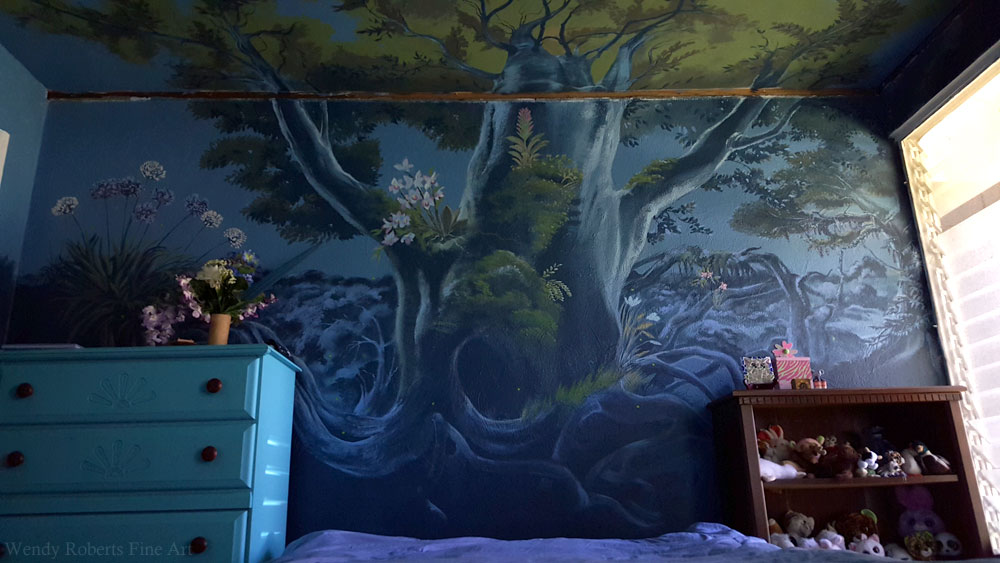
The “Enchanted Forest” is a bedroom mural on all wall surfaces, and the ceiling as well, featuring glow-in-the-dark painted fireflies and a plethora of flowers. The setting is intended to feel like twilight in a magical forest garden with a limited, soothing palette.
Because there is a huge closet on one end of the room, windows opposite, and a door in a certain configuration, there is only one way that the furniture can be arranged in the room. That made it really easy to plan the optimal vantage points, and to know where to lavish details that were not going to be obscured by furniture.
I never did share all my photos from the Enchanted Forest Mural before this, because it is being renovated and the moulding isn’t up and new windows are pending as well, but it’s time to share it anyway. I used a lot of tips and tricks for this mural that I learned from Mural Joe, one of my favorite teachers on YouTube. I highly recommend his videos – they are wonderful! Recently I posted on his channel to thank him for his help and he asked to see the mural. Even though the photos show that the home was/is in renovation (there is a lack of moulding and lightswitch panels, etc…) you can see the painting well. I will post again in a few months when all the finishing details are in place.
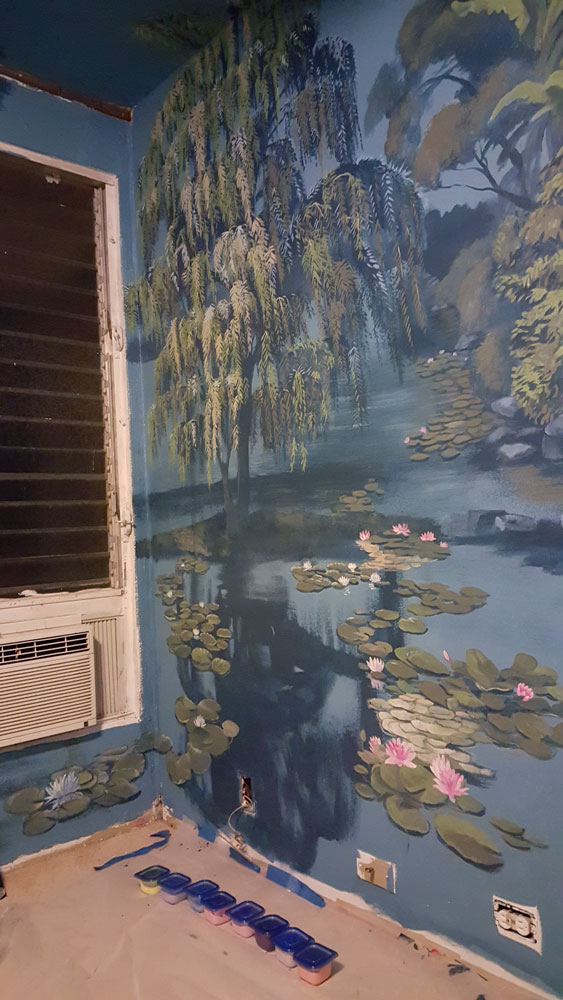
This photo tour will travel clockwise, through the room. The prior three photos display the main wall – the wall with the lily pond and waterfall. This is the wall seen when lying in bed. It has less furniture than any other wall, so it needed the most lavish details.
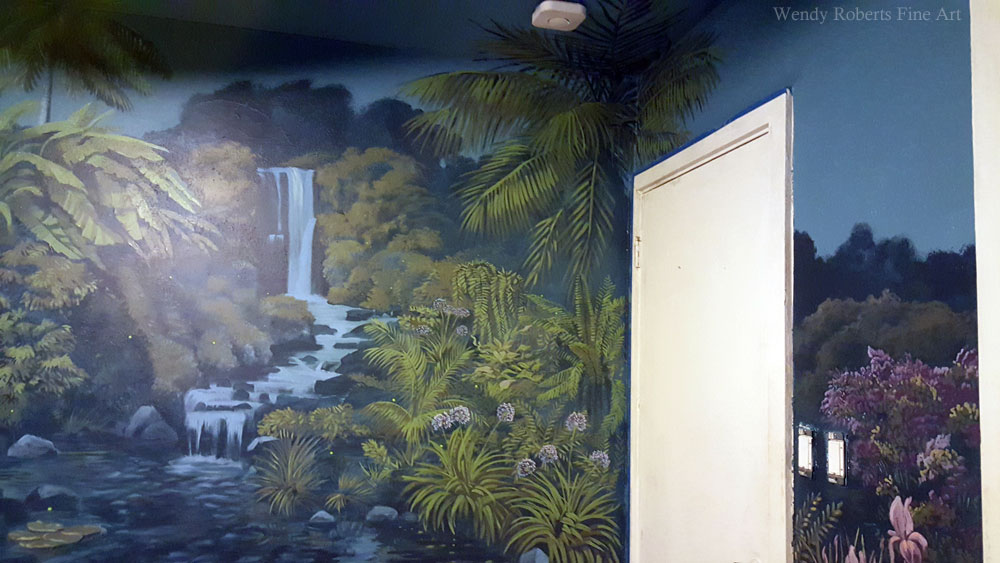
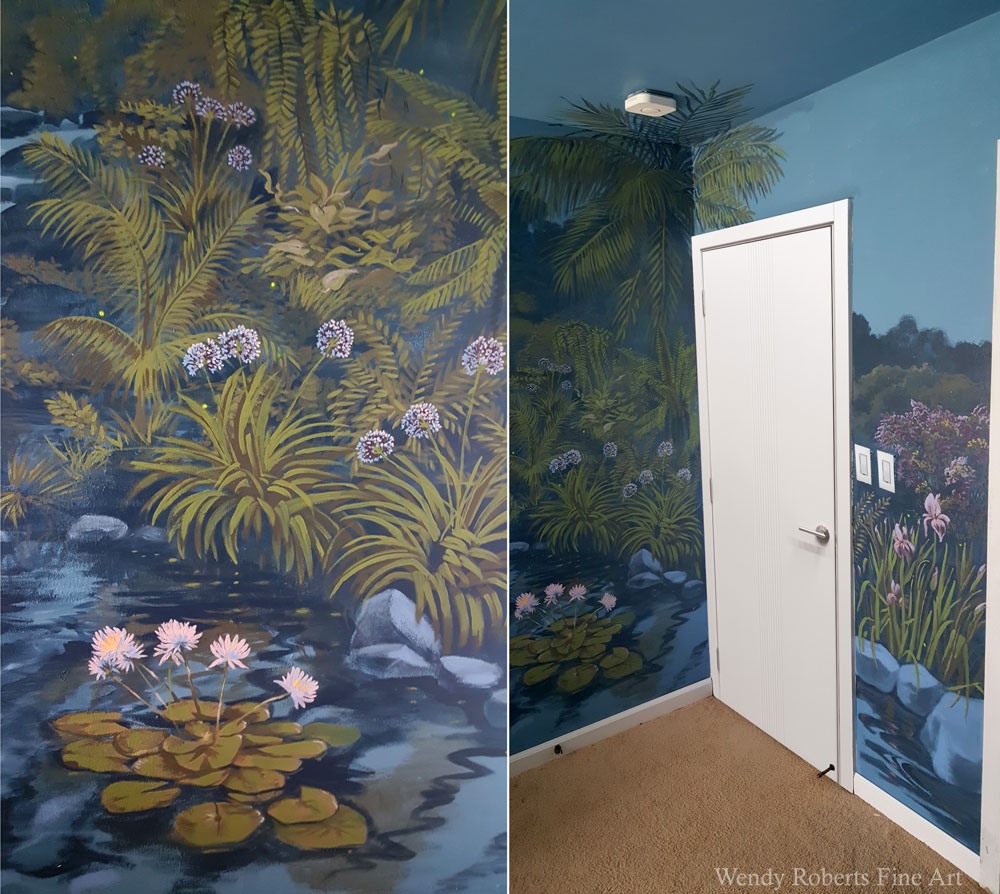
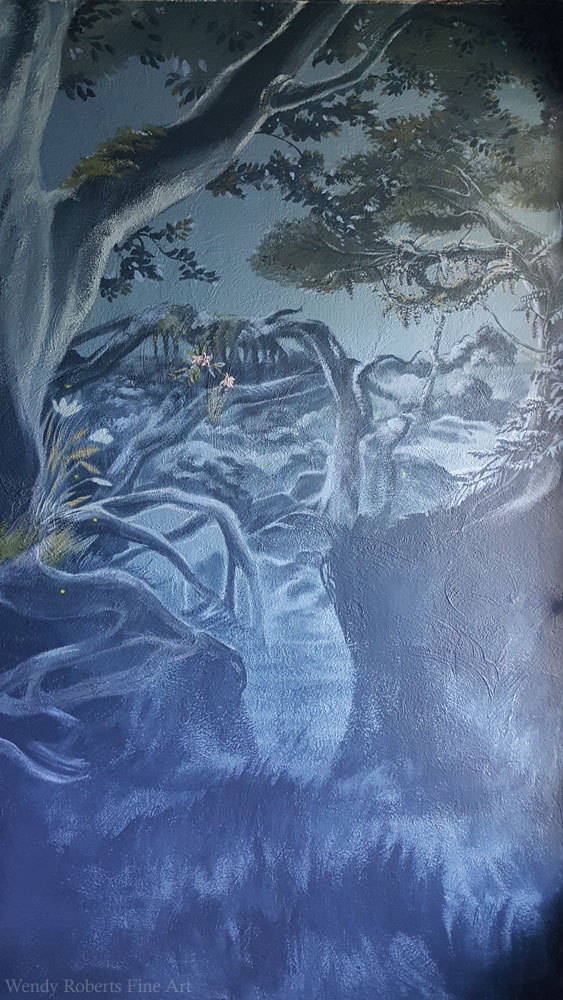
The second wall spans the door and is mostly a narrow two-foot-wide panel because the entire rest of the wall is a big closet. These photos show the transition from the lily pond and waterfall wall to wall #2, the lilac and iris garden.
The third wall is the one behind the bed. Because of this, it has the most furniture obscuring it. I kept the bottom of the wall very simple, but I still made it beautiful because the furniture might change someday if it turns into an office.
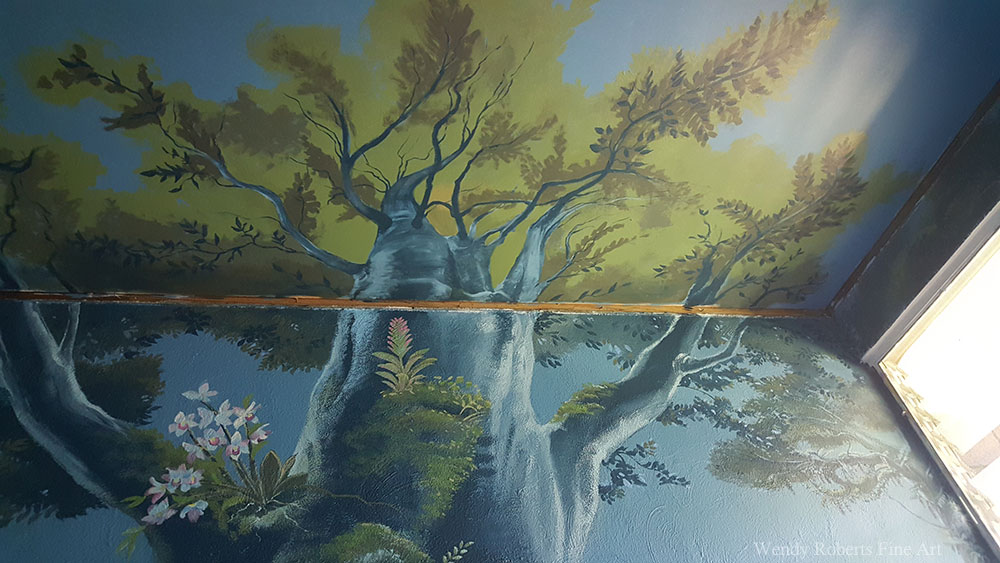
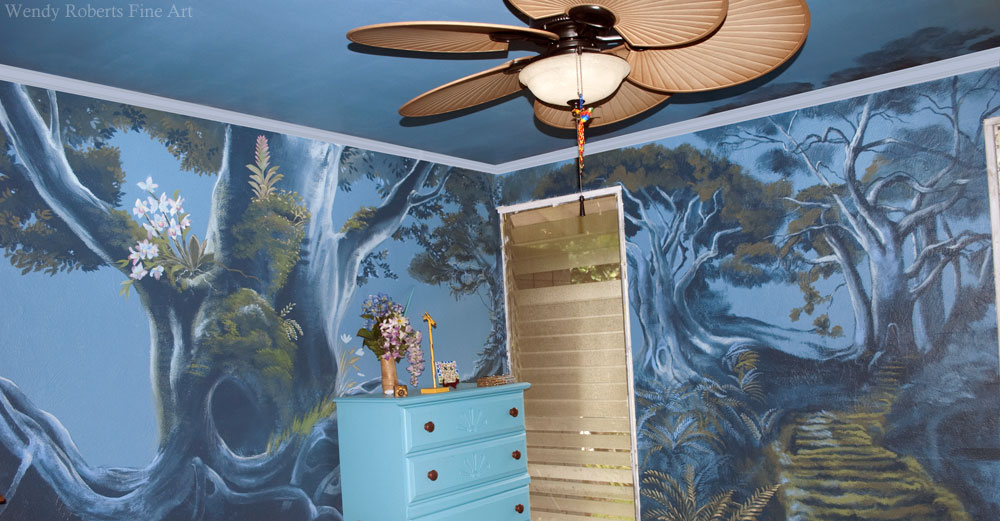
The room also needs to have visual interest that extends onto the ceiling so that there is something to look at while lying in bed staring at the ceiling. I love to relax under a tree in the summer – I do not do that very often, but I wanted to give this room that illusion of looking up at the tree canopy when the viewer is lying in bed. There is a beautiful fan that echoes the style of the room, so I didn’t want to compete with it. The tree ends before conflicting with the fan, but allows for a lot of detail on the sweet spot of the ceiling over the bed where the sleeper will end up staring a lot.
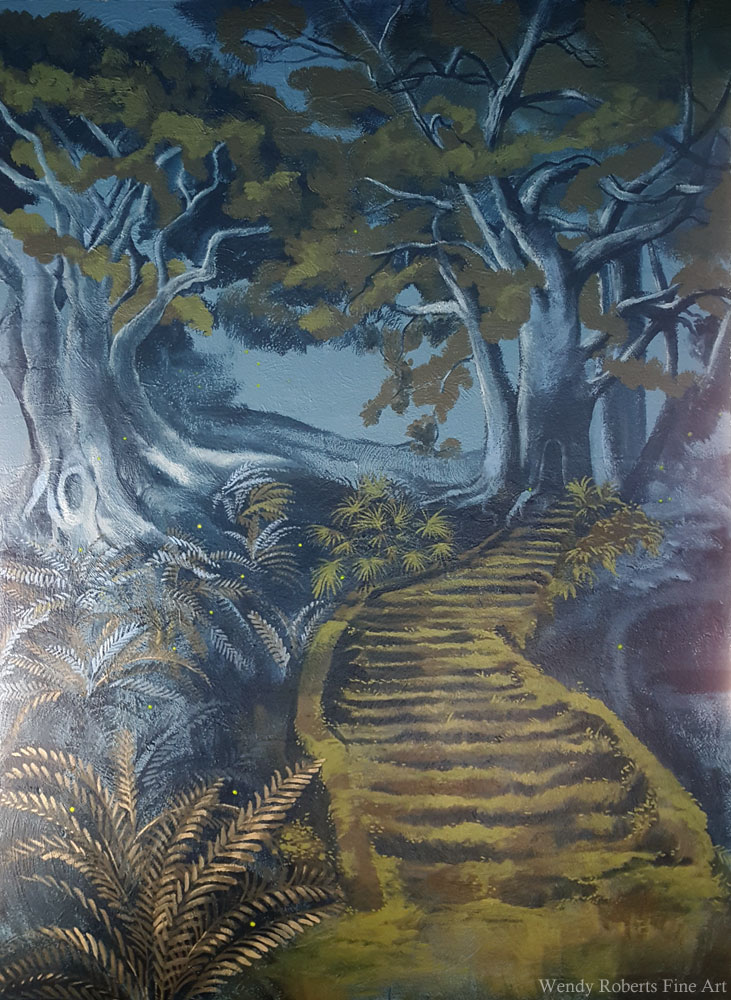
The final wall is a mysterious ancient path to an archway door. The door is set into a tree that appears to be hundreds of years old. Hopefully it prompts an imaginative journey – where does the door in the old tree lead? To the right of the path, the edge of the lily pond begins, and the mural has fully wrapped around the room. On every wall, there are fireflies painted with the strongest glow-in-the-dark water-based pigment money can buy. It is really cool to turn off the lights and see the fireflies glow green.
The base color for the room was a blue I mixed up from other paint cans I had around the house. We had moved a lot, and I read that as long as the paint is all the same base (you cannot mix latex and oil) and if it hasn’t mildewed, it’s ok to take old paint and mix it with other interior house paint to make a new color, keeping in mind that I always choose eggshell paints, the resulting gloss was going to be what I wanted for durability vs. glare. I spent some time and testing mixing up a nice mid-tone blue with a touch of green and black to muddy it up a bit and keep it from overpowering the room. From an interior design standpoint, the colors of a room make a big impact on mood and the feeling of space – does the room look large and spacious or small, or cozy – exciting or soothing? That is what color can do for the interior. I wanted the blue to be soothing and mid-toned so the space would feel meditative and spacious. I knew the mural’s illusion of depth would help make the space feel larger if I did a good job on the perspective. I chose for all the lighting to come from the direction of the windows. Everything I painted, I made sure it had the same lighting direction – I often had to change it in my head from a reference photo with the wrong lighting – Joe’s videos were very helpful in this aspect as well – knowing how the light changes as it reflects and diffuses through foliage was really a huge help for me. I imagined the light coming from the top center of the “window wall”.
The other trickiest bit that I knew the least about before starting this particular mural was the perspective. Unlike my prior murals which were much simpler, this one was quite a complex undertaking with a lot of imagination-fueled components. Thinking about perspective was really important to make it all feel like a real setting. I needed a true understanding of how to place and convert each element to be the right size in the right place. I averted a couple of total disasters using Joe’s trick of “halves and doubles”, plus estimates of how tall I thought each item would be and a little simple math in order to place some of the most intricate parts of the mural in the right places at the right sizes. With a little practice, I was able to make hundreds of elements come together into a plausible world. Thanks Joe for all the great instruction! I couldn’t have done this mural without your awesome videos!