I love to garden, and thought I would share my technique for planning the location of my plantings. I am very comfortable with Photoshop, but this would likely work with other graphic software too – anything that allows for layers. Please realize I have massively scaled down the images so they fit the Internet’s optimized needs. In reality, I can zoom in and see my yard plants very well!
Aerial Plan
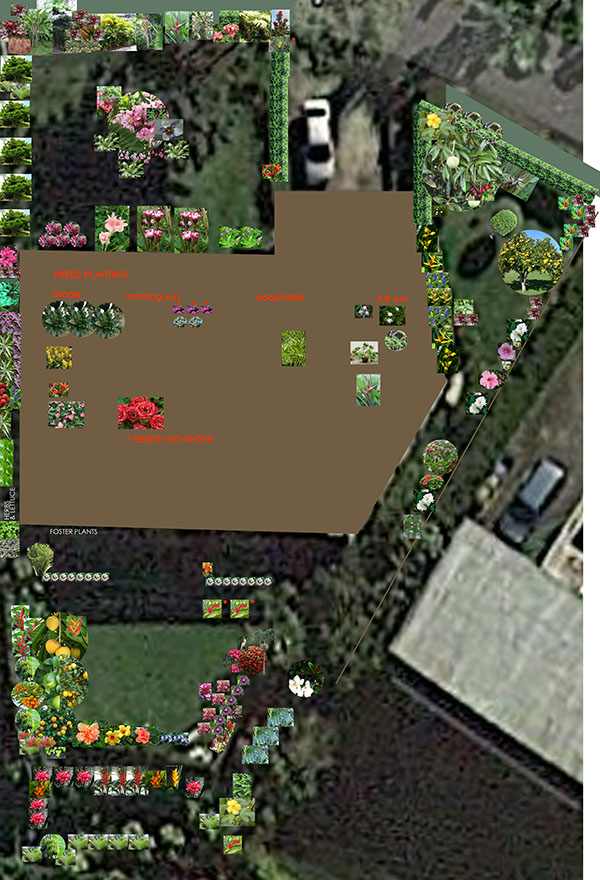
- I made a grid in Photoshop using a combo of Google Maps Aerial View with measurements of the yard.
- First I took my measuring tape and measured my yard.
- I pulled up my yard in satellite view in Google Maps. I used the PrtScn (Print Screen) Button to make a screenshot of my yard from the air courtesy of Google Maps.
- I figured out the scale of my new yard map. Some simple math on the maximum measurements of my yard indicated it would make the most sense to have a scale of 3 feet of real life yard = 1 inch in my Photoshop document. I made sure all the areas of the yard were in proportion so that the grid would help me scale and position my plants. I turned on the grid view and adjusted the grid display using Edit > Preferences > Units & Rulers in the Photoshop menu so it would have lines every .33 in, this way I have one gridline at each foot of distance.
- I rotated and pasted the screenshot of the satellite view of my yard on the bottom layer of a new Photoshop document and scaled it until the gridlines were accurately measuring my yard.
- I found photos of all the plants already in the yard (usually in bloom so I could coordinate their colors), and placed them in the yard after scaling them to the right size.
- Every plant gets its own layer.
- I always scale to the mature size that I want to have them attain over time.
- If plants will be planted underneath a tree, I place their images on top of the tree so I can see them together.
- Vines are usually represented by a photo of their flower repeated several times to equal the correct scaled length of a mature vine.
- I found photos of plants I already had in pots that I needed to put in the yard and scaled them. I named their layer with the name of the plant and the amount of sun they need. This way I knew if it is a shade plant or a full sun, or a partial, and I could more easily work them into the micro-climate they need in my yard plan.
- Now if I have a blank spot, I can take various possible plants, scale them, and place them in the plan to see which one would look the nicest.
- Sometimes I get gifts of plants from my neighbors and friends and it takes a while to figure out where I want them. I keep the plants I haven’t planted on the roof of my house in the plan so they don’t blend into the yard. That way I can easily view them and decide which of the remaining plants should be put in a certain area. I group them into visual clumps sorted by sun needs.
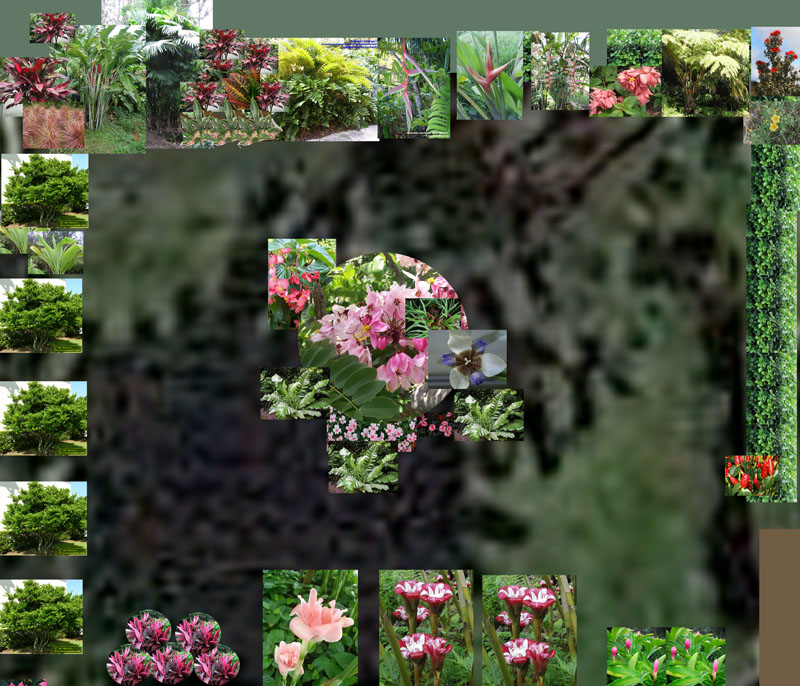
The aerial approach isn’t enough visual planning for some areas. Some plantings need layers that can only be seen from the side view, as in the case of my front privacy garden that is slowly taking the place of the preexisting hedges as they die (they are very old).
Side-View Gardening Plan for a Smaller Section of my Yard
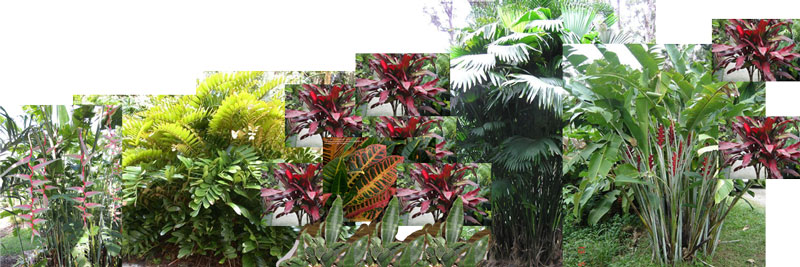
In these cases, I am working on smaller areas, so I can set a custom scale that is usually a little more generous (ie 1 feet = 1 inch). I make sure to scale the height and width to mature growth. I can arrange and rearrange to my heart’s content this way without traumatizing my plants, assuring the colors of foliage, their heights, and the rhythm of the overall garden works well for me. My mockup doesn’t have to look real, it just has to be good enough to give me an idea of what will be beautiful and more importantly, how much space each plant will need. When it is in Photoshop, I can see the grid lines and can measure the exact location of the hole I need to dig. It’s usually adequate to work by comparison, planting it equidistant from other plants now that my yard is largely established, but for your earliest trees, that would be critical to be able to look at the scale map and measure the correct position of the hole.